

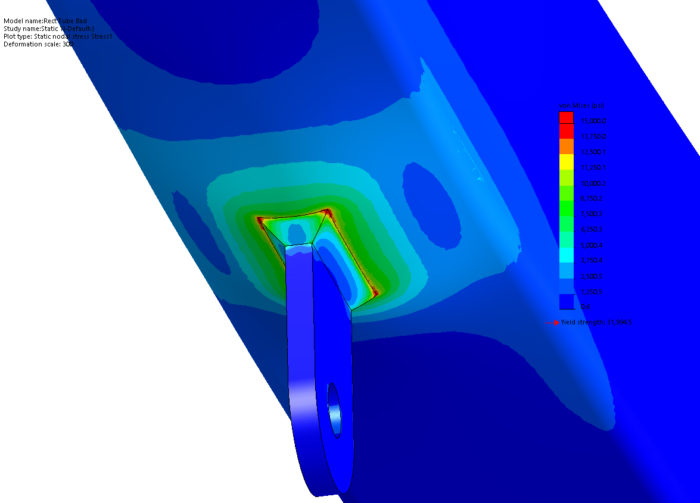
If you are an engineer who designs weldments or mangages those who do, you need to be on the lookout for these words. Every time these words are uttered, they cost you money. Lots of money! These words are “Let me run a quick FEA”
These words are words cloaked in speed and efficiency, but they are anything but. Your engineers aren’t to blame necessary, it’s just that he or she is instructed in school specifically to rely on this inferior method. And this method prohibits learning which leads to wasting more time.
Every engineer learns the basics of welding in college, but little else. When faced with real world weldment problems, we quickly turn straight to FEA. There is a large chasm between college techniques and the real world. FEA is the rickety old rope bridge about to collapse.
There are five main considerations to designing a weldment. One needs to understand the welding processes, know how fatigue will impact the structures life, plan out joint design, understand how welds with deform the structure and ensure manufacturability. When these items are implemented in the design process, there will be limited need for FEA.
After making nearly every mistake in the book, I wanted to make a better bridge across this chasm. I collected as much knowledge and insight as possible and created this Design of Weldments Class.
Let’s look deeper into what makes a good weldment from both a Design and Production viewpoint.
Understanding Welds and Communicating Them
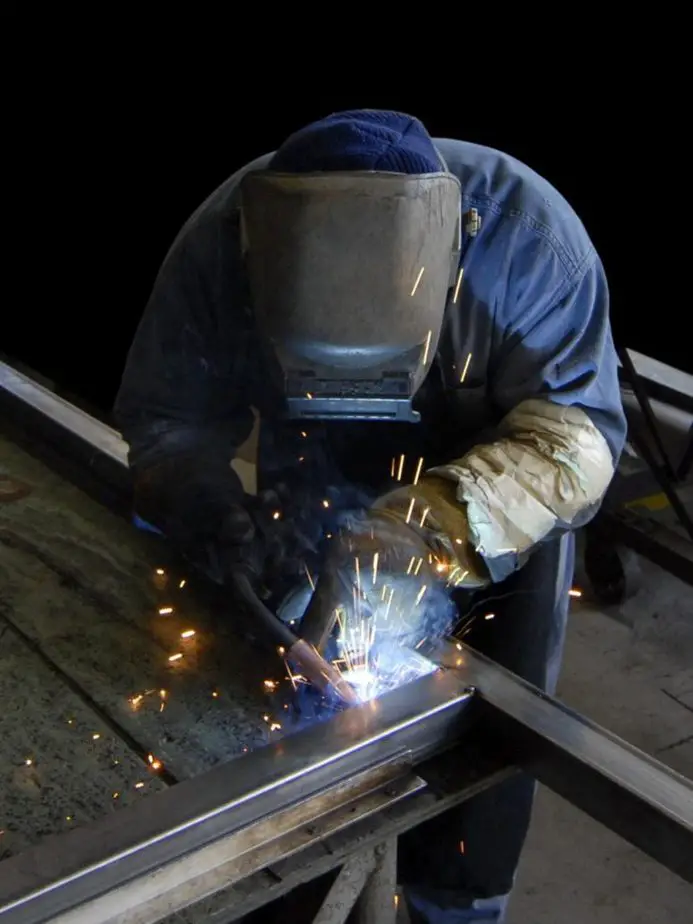
Did you know that brazing and soldering are welding processes? They are! Many think that welding has to have electricity and a filler material must melt the parent material to work right. Find out how atomic closeness and atomic cleanliness are needed for a weld to hold and how the five types of arc welding processes achieve that end.
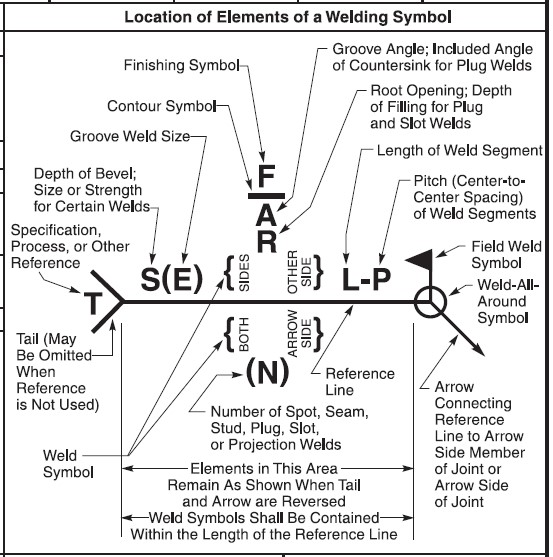
Once you understand what welding is, we need to be able to clearly state our intentions to the welder through the use of weld symbols. They are super complicated (see image below), but we need to understand all the parts and what needs to be used when.
There are five ways to joint two plates together. Which one should we use? Some of these joints have inherent benefits over another such as not beveling. We also need to leave gaps in proper places so that we can inspect easier for the correct weld size.
Sizing welds is a difficult process as well. Did you know that you can only use 30% of the weld wire strength in shear to have a good joint? Learn how to size welds quickly.
Proper Design for Fatigue
The welding process introduces complications because of the high temperatures needed. Traditional fatigue analysis is complicated and tedious. It takes too long to perform and there are too many variables to consider.
AISC 360-10 gives us insight on how to classify welds and look for an appropriate “allowable stress range”. Good news here, tensile strength is nearly irrelevant for materials under 100 ksi.
The method shown here simplifies the process so that all you need to know is the weld category (select from a picture), the lifetime cycles and the maximum and minimum stresses. No in depth calculations necessary.
This method also gives us a neat method for estimated how much a weld should increase if there is a field failure. There is a little bit of math here, but a super useful tool to quickly get an answer.
Anticipating Weld Distortion
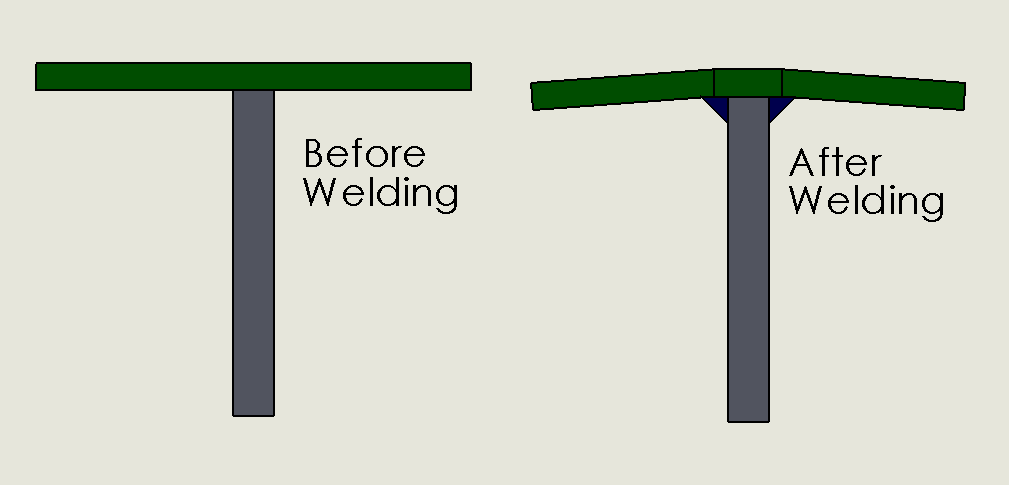
Weld distortion is a pain! It has plagued me most of my career and just about everyone else I know that designs weldments. The truth is there are many tricks that you can use to minimize or even eliminate weld distortion.
Be the good engineer and plan in advance for your weld distortion rather than reacting to it.
Did you know that if you weld symmetrically along the neutral axis will significantly reduce distortion? Adjusting your weld size is the trick
We will cover numerous mechanical and thermal methods for dealing with distortion. Many that fit in with your current production processes.
I would recommend the class to my coworkers. I thought the videos were perfect length for conveying information and introducing the concepts for further exploration. The strategies for controlling weld distortion were my favorite, possibly because at work we recently experienced issues this. You’ve already addressed my feedback for improvement regarding issuing the lesson links.
Taylor B.
Properly Designing Joints
There is a lot that goes into the proper design of a joint. The Design of Weldments Class gives some fundamentals like balancing forces focusing on stiffness and then flushes these concepts out with examples of sliding applications, gusset design, secondary members, plate to tube joints and using welds in bending.
These fundamentals are powerful and easy to remember so that you will be able to identify a good joint from a bad one instantly. We even have a session where common joints from everyday structures are analyzed.
Designing for Manufacturability
You can’t design weldments in a box! The only reason you are designing a weldment in the first place is to make a product to sell for $$$. As a result, you need to be able to produce this weldment easily and accurately. To do this, one must consider the following:
- When to machine
- Tolerances and tolerance stackup
- Fixturing
- The use of tabs and slots
When to Machine
The debate between pre-machining and post machining has been going on for decades. Who is right? Well, both! Which one is right for you? Let’s talk through the pros and cons and leave that up to you to decide.
Taylor B.
Tolerance Stackup
Are your weldments coming out too wide? A common practice is to push all the parts together and that is how wide the part will be. Well, everything has a tolerance: plate thicknesses, kerf on a laser cut part, and cut length on a piece of raw material. Is your design able to handle these tolerances? You may want to leave some gaps, but where and how? One overlooked situation is when bent parts pucker in the corners. We’ll show you how to handle these without using the welder’s most expensive tool…..the GRINDER!
Fixturing
Sure every welder can hand tack every weldment up separately, but having a tack fixture is a god send. A fixture will allow you to create accurate and repeatable parts in a fraction of the time it takes to hand assemble them.
Learn how as the designer, you can tell the fixture designers which features of the weldment are important to hold and which are not.
Tab and Slots
Since the advent of the laser cutter with high accuracy edges, the use of tab and slots is becoming prevalent. And for good reason: self fixturing parts. In many weldments, this can reduce complexity or even eliminate a fixture altogether! Whoo hoo!
Hold on there, what you may not realize is that tabs and slots have multiple stress concentrations in them which are impossible to accurately model in FEA. There are certain slot shapes which can promise more accuracy, but at the cost of strength.
So let’s be smart about designing tabs and slots so that our weldment doesn’t fail unexpectedly.
Summary
There is a lot that goes into the designing of a weldment. This Design of Weldments Class will be the tool you need to design a weldment fast and with low risk of failure.