

As I often design equipment that uses roller chain and sprockets, there are occasional failures. It is critical to identify the failure mode and eliminate the cause.
Overload, fatigue, rust and high speeds combined with small sprockets are the four main reasons roller chains fail. Overload and fatigue can be caused by galling, shock loading, misalignment or loads that are too high. A 10:1 safety factor is recommended. Rust is usually a sign of poor maintenance.
Let’s explore each one.
Causes of Chain Failure
Overload
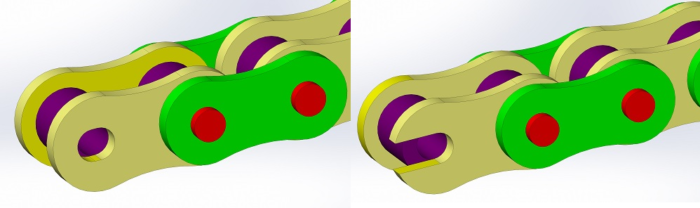
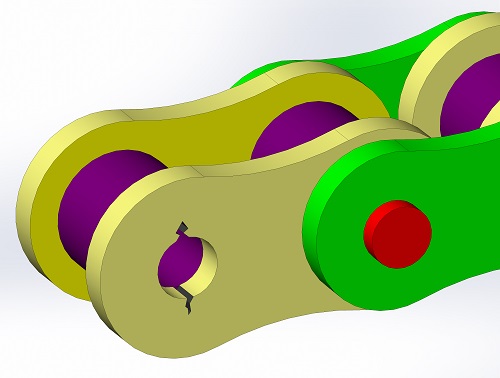
Having loads that are consistently too high will manifest itself as the pin holes enlarging leading to eventual tear out. The other cause is the pin breaking. Pins can break because of high shear loads, but also because of galling. Galling is the wearing of two parts on each other. Without proper lubrication, the pin can gall on the links and that leads to pin failure.
The loads applied for an overload condition are generally constant during use. If you notice that only one side of the plates is worn, look for misalignment. Misalignment will load one side of the plate more than the other.
To correct this, determine the cause of the overload. This may require performing calculations and making significant design changes. A safety factor of 10:1 is recommended for a new design.
If you are transmitting torque from one shaft to another, using larger sprockets can minimize the force. If you need to have a certain chain force, as in the case of linear motion, you will need to increase chain size or switch to a heavy duty version.
Inspect for chain misalignments; a laser pointer or level can be a huge help. Once corrected, tighten the bearing and sprocket set screws so that it doesn’t happen again. Finally, if this chain is worn replace the entire thing, not just a small section.
Plate Fatigue
The symptom for a fatigue failure is different than we see in an overload condition. Rather than shearing the hole out like with overload, fatigue loads will crack perpendicular to the axis of the roller chain. The cause of this is the highest stress is on the material right at the quadrants perpendicular to the axis of motion.
If you can imagine, the stress flow increases around the sides of the hole. But directly before and after the hole, the stresses are fairly low. Having a high cyclical load starts ‘cold working’ the material in these high stress concentrations until a crack forms. Once the crack has started, it is only a matter of time before the link plates will fail.
To resolve this cause of failure, find out where the large cyclical load is coming from.
- If using a hydraulic motor, chain fatigue is usually caused by stopping. Is the center position of your spool cut for a float or motor spool or are there cross port reliefs to prevent pressure build up?
- If it is caused at startup, can you use a proportional valve that automatically ramps up to full speed? You can do this even with a digital control system. You can also add a small accumulator on the pressure line to dampen startup and smooth out any overloading conditions.
- If your issue is during normal running do you have flow control valves on the return hydraulic lines so that the flow is metered back into the valve? (This is a major cause of motor instability). Most people want to meter the flow into the motor, but this results in the motor going from high to low speeds as friction and loads change on the system.
With electric motors, there is less that can be done to improve the dynamic effects on the system. Your only actions here may be to enlarge the chain size or sprocket size or add a flywheel.
Another option that is out there, but I am reluctant to recommend, is putting a second chain tensioner on the high tension side. So we all want to put a tensioner on the low tension side because it can be designed to be very small since there isn’t much tension on it. Adding one to the high tension side is more difficult because these components will have to be much more massive and often requires the use of very heavy springs or a cylinder under constant pressure.
Putting a tensioner on the high side will smooth out the cyclical component which will prevent fatigue. For some systems, this may be a last ditch effort.
If you have had a fatigue failure in your system, please check the calculations. There may be some flaw in the design. Again, lowering the chain force by using larger diameter sprockets will help. Be sure to replace the entire chain.
Rust or Corrosion
This one is way too common, but there are several different kinds of failure modes. Link plates that crack in arcs are a symptom of exposure to an acid or other caustic substance. This should not be confused with fatigue failure.
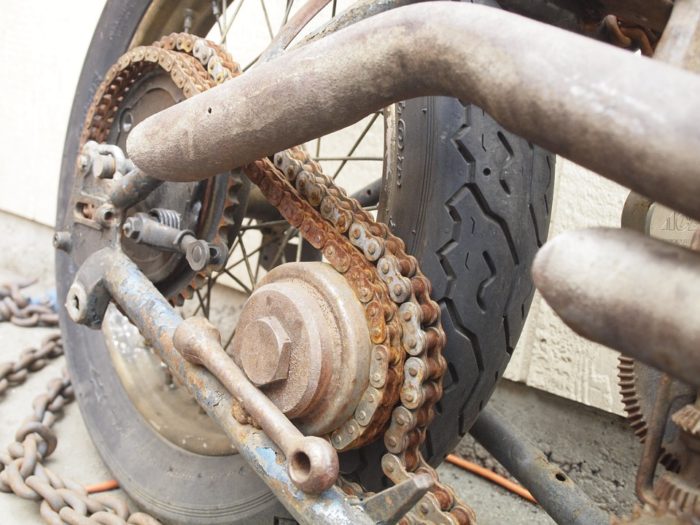
Another symptom of corrosion is surface pitting and this is generally noticed on the sides of the links. Rust is by far the most likely to be seen in industrial and mobile settings. You will probably notice the red color first, but another symptom is kinks in the chain. Kinks form when the chain isn’t exercised and the chain links, pin and sleeve rust together. It is most noticeable when the chain is rusted together when engaged on the radius of the sprocket.
To prevent corrosion, you will need to remove the chain from the environment. Sometimes the corrosive environment may be created from your lubricant. Avoid lubricants that contain water, acids or alkalines.
If you cannot separate the chain from the environment, maybe switching to serpentine or v-belts would be a better solution. They are often more chemical resistant. To prevent rust, proper lubrication must be done more often and before storage.
High Speeds
Any rotating piece of machinery has a critical speed; roller chains are no exception. The critical speed is the chain velocity where uncontrolled vibrations will occur. These vibrations are always undesirable. The difficult thing is that the speed is very difficult to calculate and often gets overlooked.
The good news is that if you find your machine operating at the critical speed, a change of 10% can make a huge difference. Critical speed is the function of length of chain span, tension in the chain (be sure to check high and low tension sides) and chain speed just to name a few. For those of you who play guitar, this is the same concept. We can alternate tension, string size and string length to get different frequencies.
Just like with buckling, the best solution may be to add supports for the chain so that it can’t move. Adding a support requires the chain to vibrate at the next highest natural frequency. Using the guitar analogy this is adding the harmonics of (sequentially) the 12th, 7th and 5th fret.
Using a chain tensioner can sometimes solve this problem as well, by adding more tension. Using a lighter weight chain or switching to V-belts can also help.
So how do I prevent chains from causing problems? The key is inspection and preventative maintenance.
Inspection of Roller Chains and Sprockets
Inspection is critical for the longevity of your chain and sprocket system. Inspections should be done daily and semi-annually or annually depending on the operating environment. I would lean more towards semi-annually if your system is outside, in corrosive environments or if downtime has a severe impact on production. It is far easier and less costly to schedule downtime than have it forced upon you.
Daily inspections should be designed to be quick and look only for major problems. Some items should be done while running the machine and others while it is off. Be sure to lock the machine out while inspecting! Here are some questions to think about when determining your daily inspection list.
- Is the chain routed on the sprockets and other rests properly?
- Does the chain tension appear to be right?
- Are the shaft bearings lubricated?
- Are there any objects that are in the way of the chain moving freely?
- Are there any wires or hoses that could get caught?
- Does the chain have enough oil on it?
- Are the master links properly secured?
- Are there any new or unusual sounds?
- Are there visible signs of rust or other corrosion?
- Is the chain tensioner working properly?
- Are there any dynamic issues on the chain when running?
- Is there any sign of misalignment in the system?
- Are there any kinked links?
- Are chain supports worn or damaged?
All these inspections can be done in a relatively short amount of time. Having a daily checklist can prevent large amounts of machine downtime. If the inspection process is simple and quick enough, the operators will be more likely to complete the process without much coercion. Now, onto the big inspection.
Six to Twelve Month Inspection
- Perform all the tasks in the daily checklist. – While this was probably already done with the operator, having a dedicated maintenance worker look over the machine is a necessity. An employee from maintenance will more than likely be looking at the machine from a much different perspective and the likely result is he or she will find something the operator will not.
- Check for chain stretching. To do this, remove the chain from the machine and lay it out in a line pulling it tight. Use a tape measure to measure between the leading edge of two pins. For more accurate results measure as many links as possible. If removing the chain is not possible or practical, you can use a set of calipers to measure the inside and outside dimensions between two sleeves. Be sure to get as many links in the measurement as possible. Average these numbers. Using the formulas below, calculate the chain elongation. If the chain has stretched more than 1.5% (0.015), it is time to replace the chain.
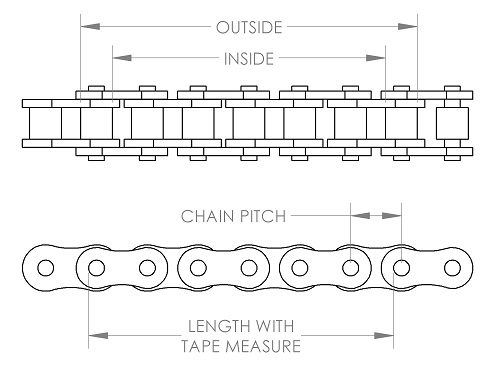
Initial Length = Chain Pitch x number of links

- Check for link plate wear. You will know pretty quick if the pins are contacting something on the side, but the profile of the link is a little more difficult to spot. You will need calipers to measure this. You will measure the width of a new link and compare it to the width of the worn link. If it is less than 95%, it is time to replace the chain.
- Look for pin galling – This is usually caused by inadequate lubrication and / or running at high speeds. Each time the chain goes around, the pin is rotating on the link four times. This builds up heat quickly. If the speed is too fast or there is no lubrication, the pin will rub and eventually wear away. To inspect for this, you will need to remove several pins and inspect. If the galling is minimal, you may be able to lubricate and reassemble. I try to lean on the side of caution and replace the chain if I see galling on multiple links.
- Inspect for tight joints and kinked links – A kinked link is a dead giveaway that there is something stuck in the link or it has rusted together. Remove any visible object and disassemble. Check for galling on parts, replace and reassemble. It may be necessary to replace the chain or at least a couple links. Lubricate well before use.
- Check for Hooks on the Sprocket Teeth – These are worn spots or burrs on the sprocket teeth. Minor issues can sometimes be ground off, but you will need to replace the sprocket with larger issues. Be sure to look for the cause of this. Misalignment or overloading is often to blame here.
- Clean and lubricate the chain – This is hands down the most important step to good chain functioning. Lubrication is the only thing that actively prevents rust on a chain and prevents the moving parts from galling on each other.
Most chains come from the manufacturer pre-lubricated. Steps should be taken to keep them from coming in contact with dirt. Don’t lay chains on the floor, that’s where the dirt is. Lay down some fresh plastic sheets instead. Those sheets are a whole lot cheaper than the chain.
When cleaning the chain, be sure to use an approved cleaner for use on chains. Do not use acid cleaners, liquid alkalines, gasoline or benzene as they have adverse effects on the steel chains. Kerosene is a good cleaner, but check with your company’s policies for using it.
There are many spray-on chain cleaners that work really well too. Just be sure that they are safe for use around O-rings. Chances are, you will have an O-ring near where you are spraying.
I recommend using a toothbrush or a chain brush to get particles off the chain. Wipe the dirt off the chain with a clean rag (it may take many rags to do this). For dirty chains, spray and repeat the cleaning process. Some people recommend a final rinse with water, but I don’t recommend that. Water is the enemy and there is enough of it in the air. We don’t need to look for ways to make our chain rust.
The next step is to dry the chain. You can do this by letting it sit out.
Finally, lubricate the chain. Select a lubricant that is safe on O-rings. You also will want to consider a no-fling formula. Nobody likes having oil flung at them when the machine starts up. It creates a mess on any surface in its path and ticks off the company environmental guys.
If a chain has a significant amount of rust on it, consider soaking the chain in the lubricant for a few hours. Hang it up so that it can drip into a bucket. Your chain will be well oiled around the pins after that. Be sure to resist the temptation to wipe the chain dry. One final thought on selecting a lubricant: be sure that it does not contain water. There are many, even popular name brands, that contain water. Don’t use those. The water will eventually do what it is meant to do to steel: make it rust.
Roller Chains and Sprockets are great systems to transmit power because of their high efficiency and robust design. If you use this criteria to design a chain system and maintain it, your system should have a long working life.